Amazon Elastic Compute Cloud (AWS EC2) is an Infrastructure as a service (IAAS) cloud service provided by Amazon.com that enables users to rent a virtual machine where they host and run their computer applications. Amazon EC2 provides users with what is called an Instance, a web service through which a user can boot an Amazon Machine Image (AMI) to configure a virtual machine that contains your software. Users can create, launch or terminate EC2 instances as desired. Websites such as Netflix (As of 2022, they were the biggest EC2 user by monthly spend), Facebook, LinkedIn and Twitch are some of the more popular websites that use AWS EC2 for their cloud services.
Get ready to get your steps in as I walk you through how to create and configure your first EC2 Instance.
Create AWS EC2 Instance
To be able to create an EC2 Instance, you need to have an AWS account, if you are yet to have one and need guidance creating one you can check out how to create an AWS account. Once you have an AWS account, you can now go ahead and begin creating your EC2 Instance.
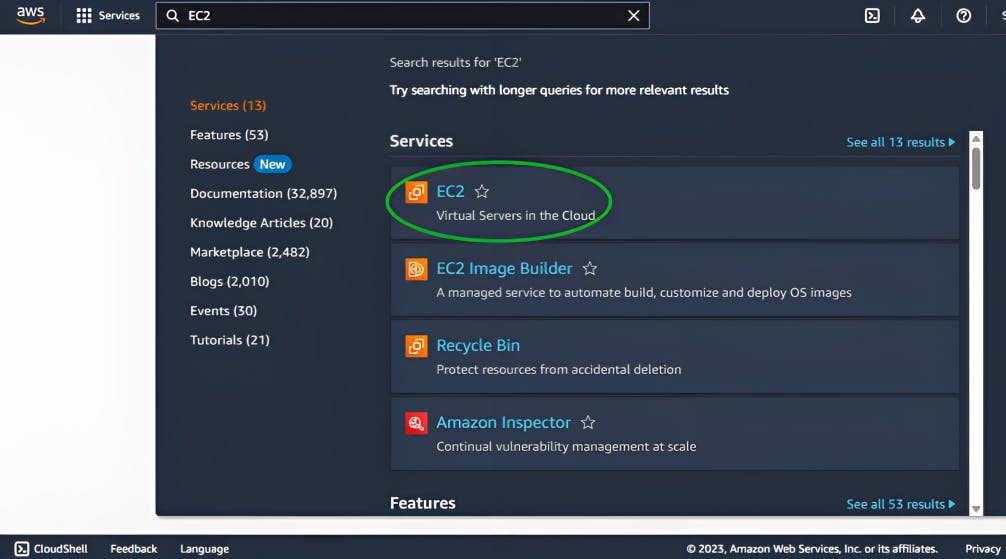
First, when you are logged into your AWS account, go to the EC2 Instances view, this can be done by using the search bar to navigate to EC2 instances by clicking on EC2 and then navigating to the Instances view
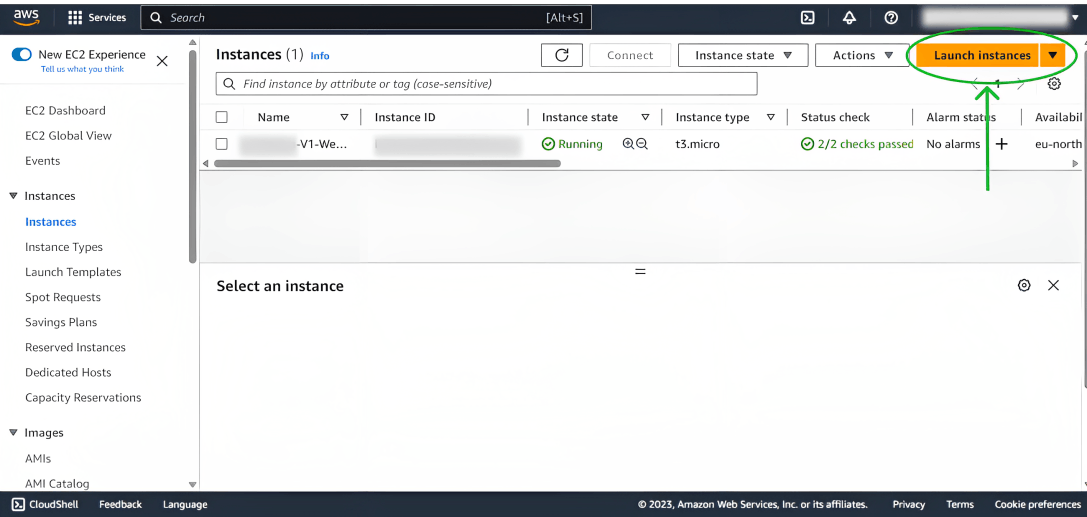
Where you can create (launch) and manage your instances. To begin creating your new Instance, click on the Launch Instance button.
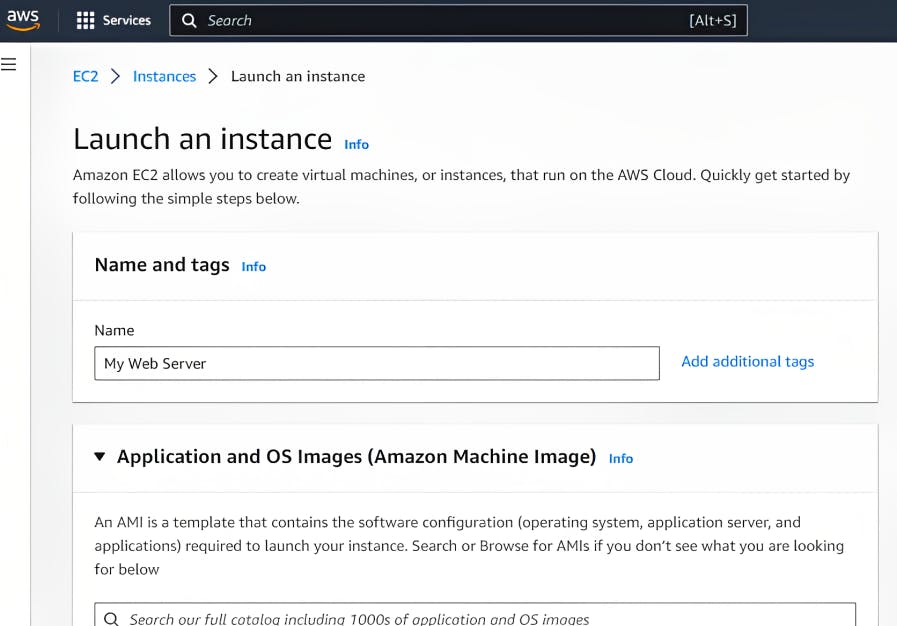
This should take you to a view with a form that allows you to configure your EC2 Instance. I will walk you through the basic configuration in 6 steps:
Step 1: Choose a name for your EC2 Instance. You can choose whatever name you want for your Instance. E.g. myinstance-1
Step 2: Select the Amazon Machine Image (operating system) you will prefer to use to launch your Instance.
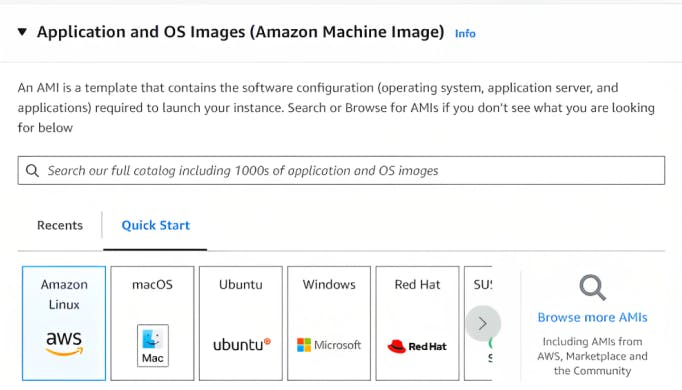
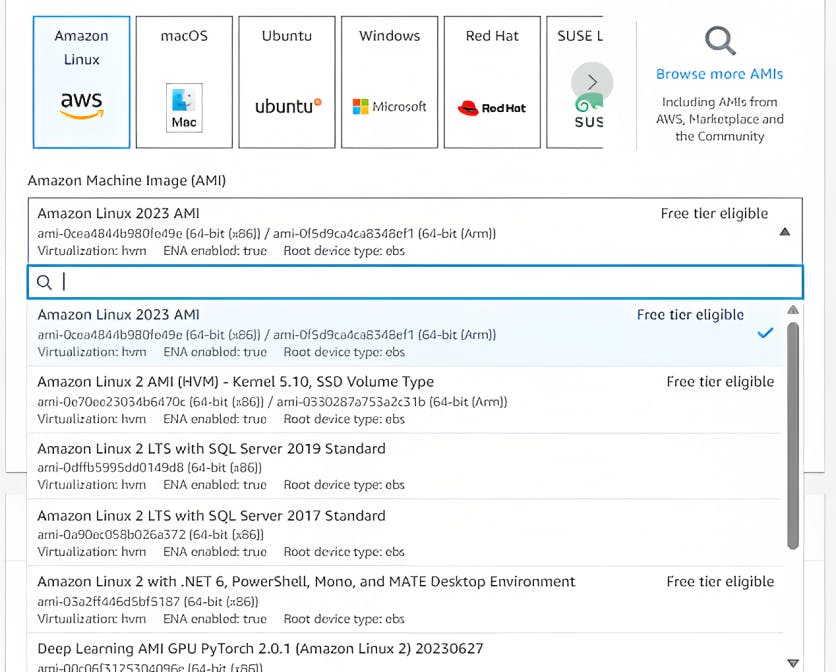
As a beginner or a non-enterprise user, it is advisable to select an Amazon Machine Image (AMI) that is free tier eligible to keep cost at a minimum.
Step 3: Select the Instance type that’s most suitable for your use case. Amazon EC2 provides a wide array of Instance types that suit different use cases. These Instance types have various combinations of storage, CPU, memory and networking capacity. To learn more about how different Instance types can meet your computing needs, check out AWS EC2 Instance types. Again, it is advisable to select an Instance type that is low-cost or free tier eligible if you are not an enterprise user.
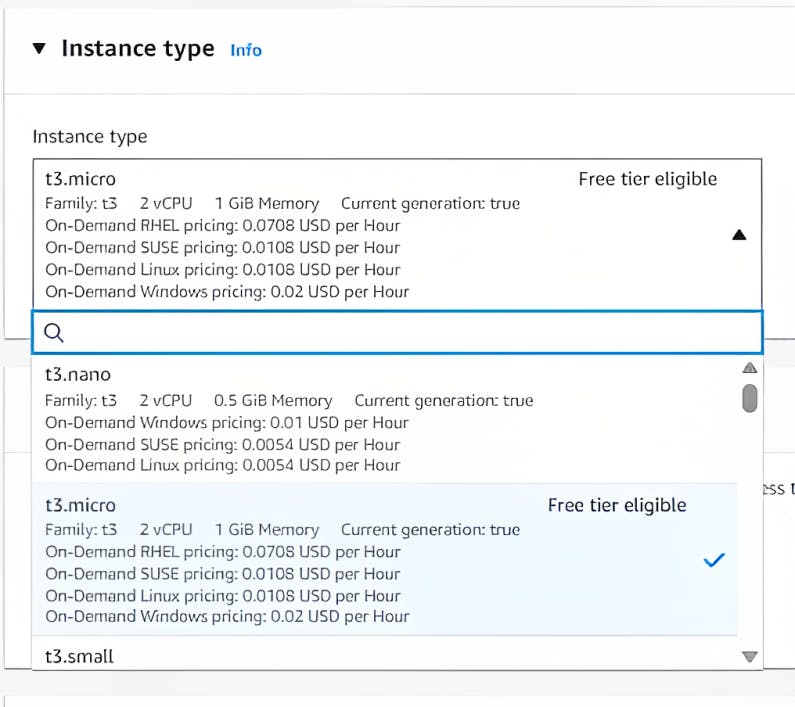
Step 4: Create a key pair or select one if you have previously created one. Your key pair consists of a public key and a private key. They serve as your security credentials that allow you access to your EC2 Instance. Go to Amazon EC2 key pairs to learn more about key pairs.

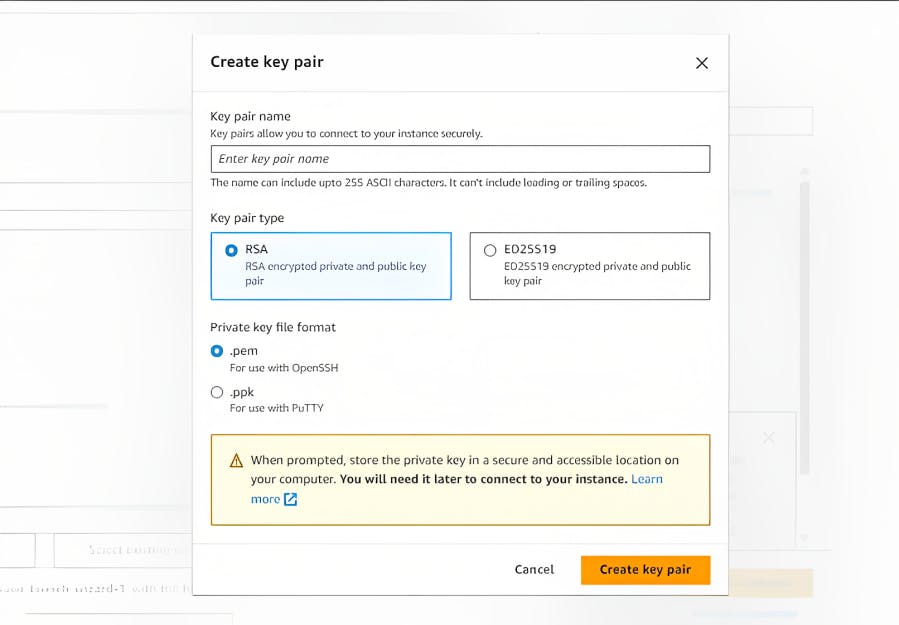
For this post, our key pair will be RSA encrypted and our private key will be in .pem format (I consider this to be more straightforward than having to use PuTTY).
Please ensure you store at least a copy of your private key (the .pem file) in your project (or any) directory where you will most likely launch your instance from.
Step 5: Configure your network settings. The default network settings are fine the way they are but you can edit them to configure them to as you’d want especially to select a particular availability zone.
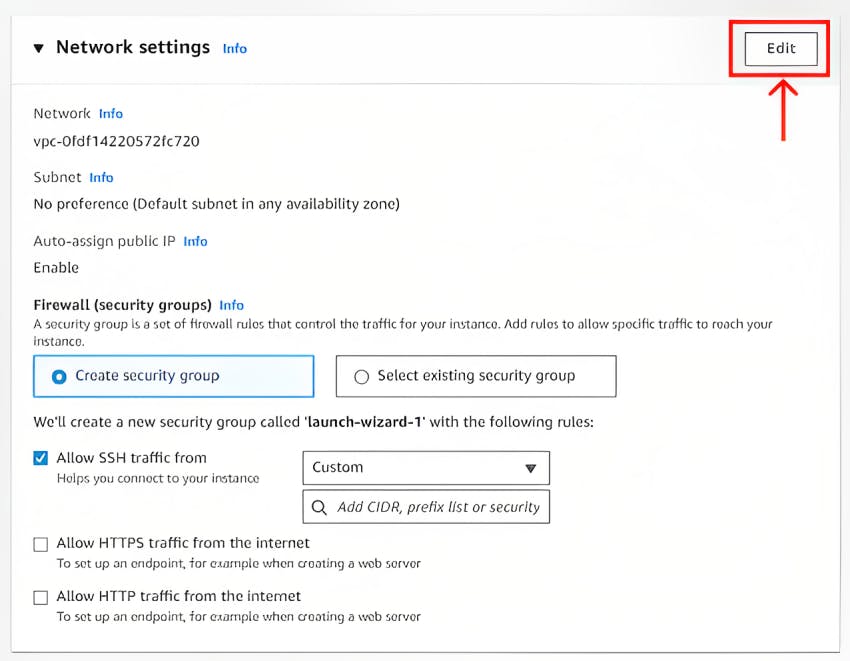
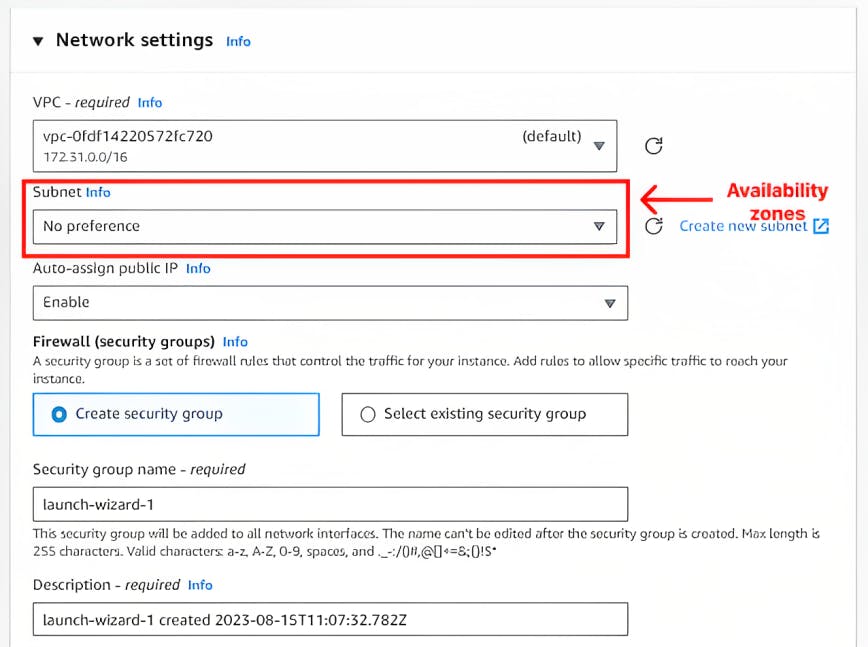
Availability zones are isolated and independent data centers spread across a region that offers protection from failures or catastrophic events in data centers at other zones. Although the default no preference setting (which is preferred setting) allows access to any availability zone but you can select a specific availability zone of your choice.
Step 5.5: The second half of the network settings requires you to select or create a security group. A security group basically acts as a virtual firewall that controls inbound and outbound traffic to your Instance and by extension your website or web app. You can instantly create and configure a security group from the edit network settings view.
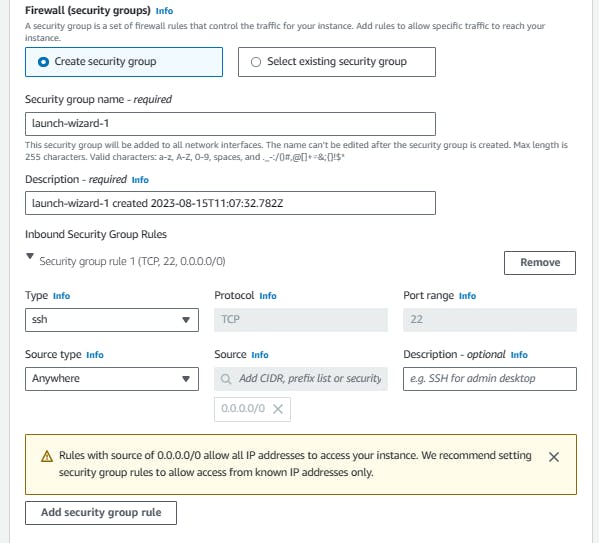
First, you choose a security group name, note that you will be unable to edit this name once you have created the security group and your security group name cannot start with sg-. A security group name must be unique for the VPC. After entering your security group name, you can then enter a brief description of your security group (between you and me that could be anything). Now it gets interesting, you will configure your Inbound security group rules. The default security group rule listens on port 22 which allows SSH access for Linux Instances or RDP access for windows Instances from the command line on your computer.
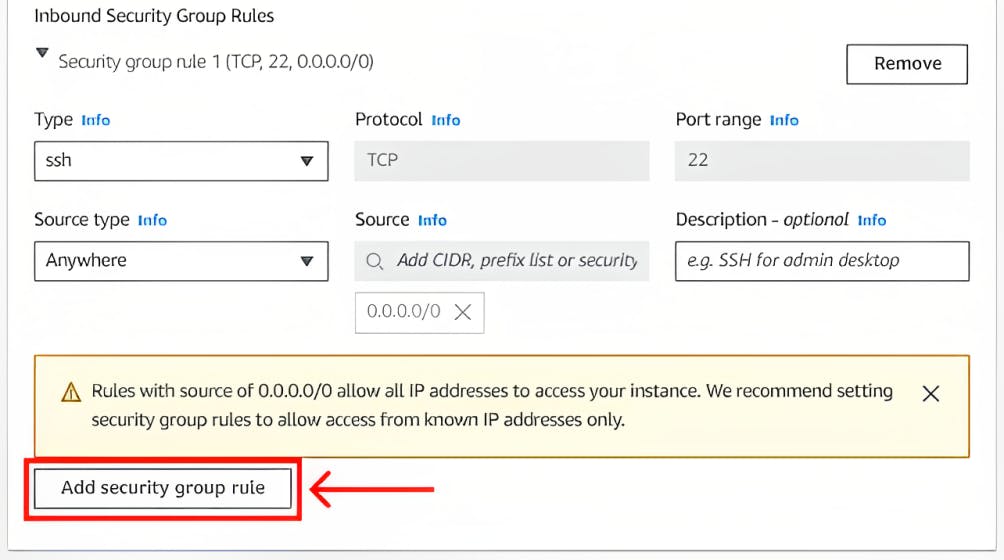
I will now walk you through how to create a new Inbound security group rule if your instance is going to function as a web server. First, you click on the “Add security group rule” located after the default security group rule then you get another security group rule that looks like the second image below.
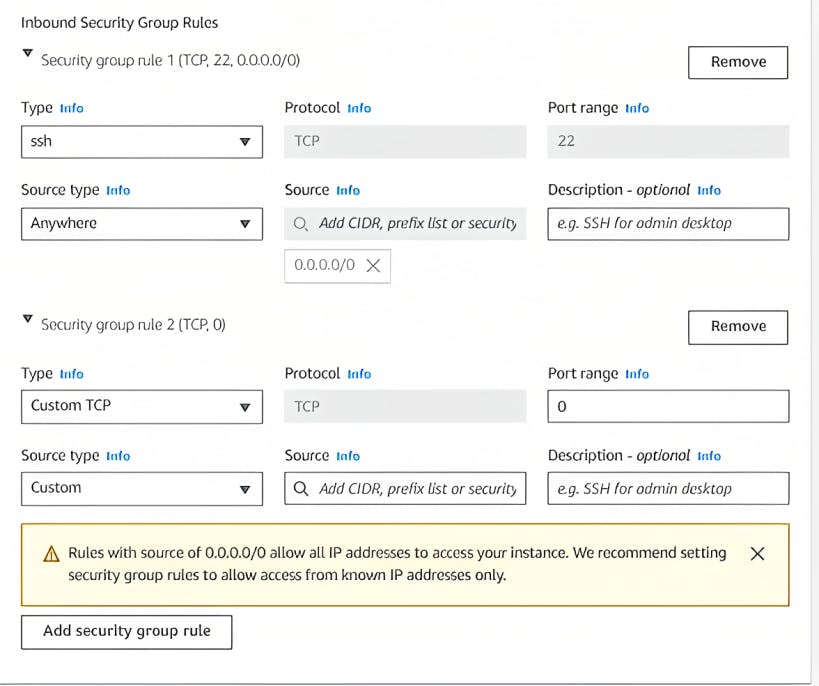
We are going to be creating two new security group rules that allow all IP addresses to access your instance via HTTP and HTTPS so your users can browse content on your web server.
For the first security group rule, select HTTP as Type which refers to network traffic type, this will automatically set Protocol to TCP and Port range to 80 as that is the standard port number assigned to HTTP servers. You will then select Source type, this refers to where your instance can be accessed from. You can either allow your instance to be accessed from anywhere or only from predefined known sources i.e. setting Source type to My IP which specifies your current IP address as the only source that can access your Instance or to Custom where you can specify the IP Address or security group that will be allowed access to your Instance. So for this post, you will set your Source type to Anywhere which will set the Source to 0.0.0.0/0, this allows your Instance to be accessed from anywhere in the world on an HTTP web server.
Now configuring the second security group rule should be straightforward, you will set the Type to HTTPS, this will also automatically set Protocol to TCP and Port range to 443 This is because similarly, 443 is the port number assigned to HTTPS which is like a secure version of HTTP (more on that another day). Just like the HTTP rule, we will also set Source type to Anywhere. When you are done, your Inbound security group rules should look something like this;
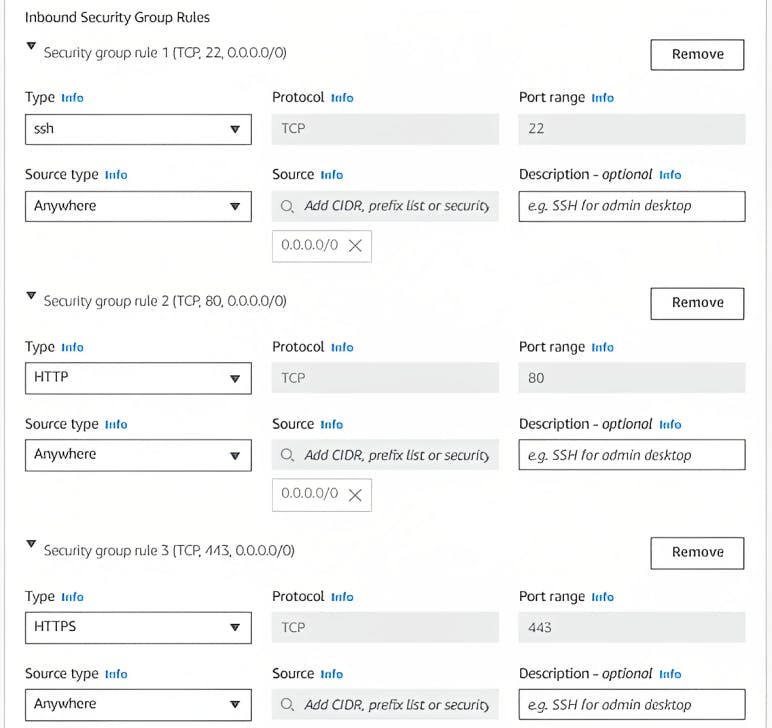
You can learn more about security groups by checking out Security groups.
Step 6: Configure storage. When it comes to configuring storage options for your EC2 Instance, it is okay to go with the default option which is quite sufficient if your software does not require enormous storage space. AWS offers free tier-eligible customers up to 30GB of storage space (EBS General Purpose (SSD) or Magnetic Storage).
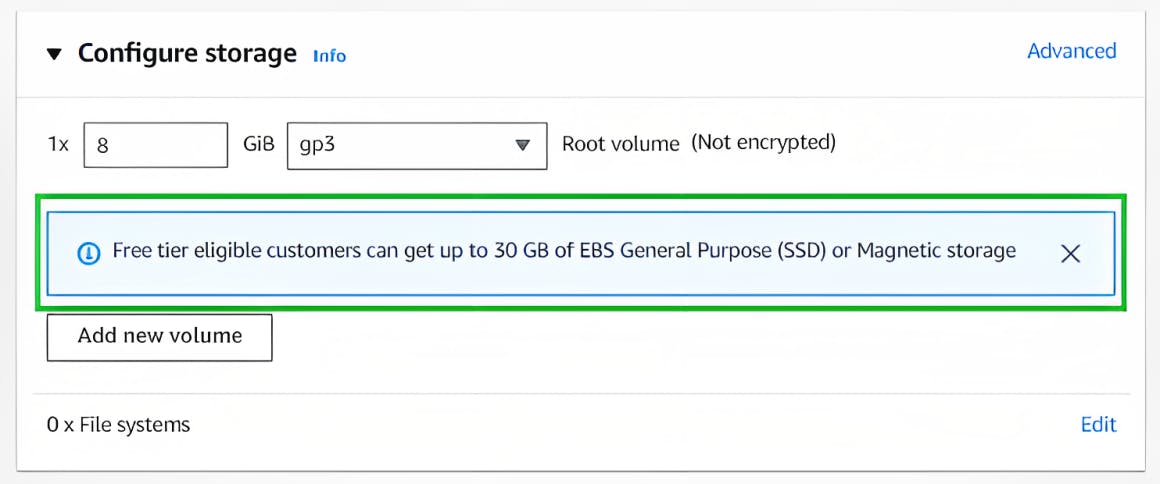
And that seems like a sufficient amount of storage space so I will stick with the default storage options.
At this point, we do not need to change any of the advanced details so we will leave them and then proceed to launch our EC2 instance by clicking the orange button highlighted in the image below.
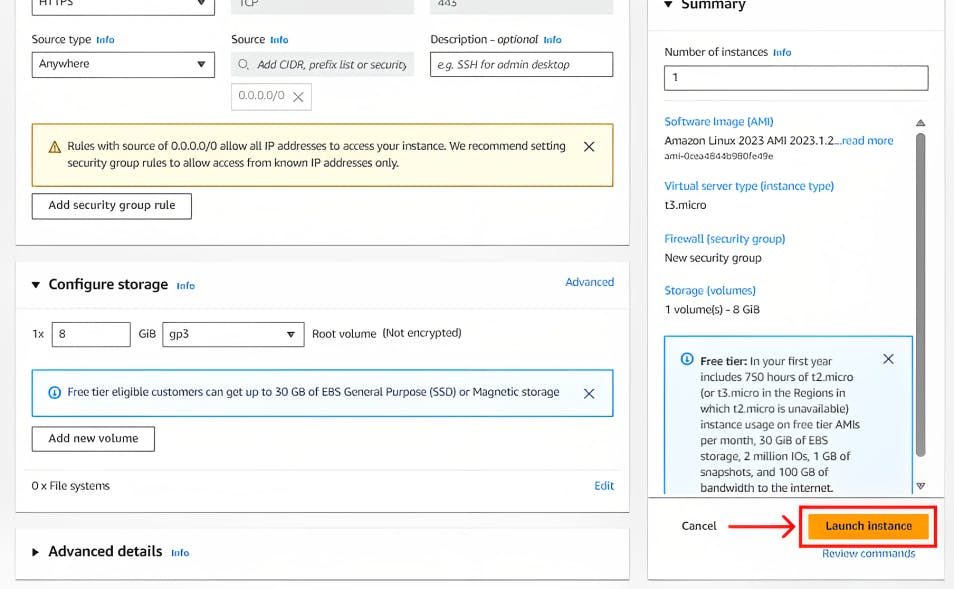
Once you click the button, the Instance launch process will be initiated and in a few seconds, your EC2 Instance will be created. This will then take you to a view that shows that the launch of your instance is successful.
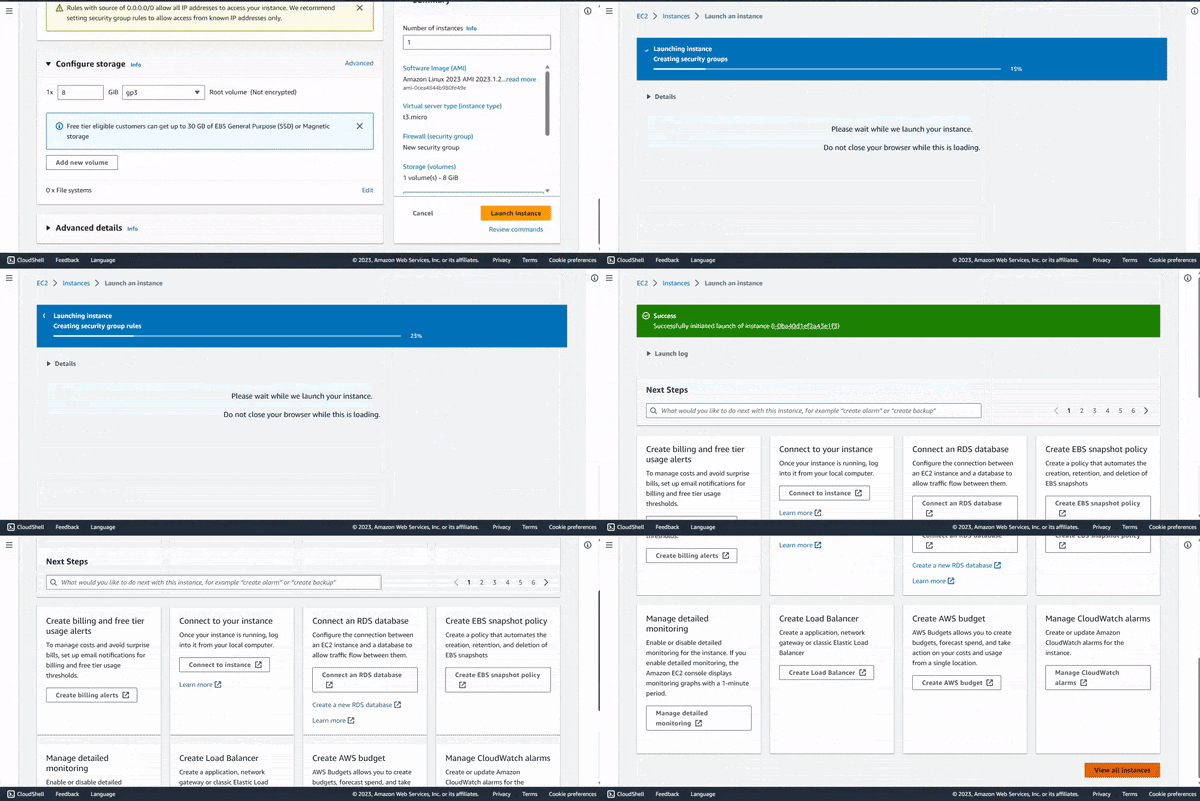
Then click on the ‘View all Instances’ button at the end of the page to view and manage all the Instances you have created.
Ensure that your Instance state shows as running and that it passes 2/2 status checks, if this isn’t the case, you may need to refresh this web page for the changes to reflect.


At last, your first AWS EC2 Instance is up and running, you can now proceed to deploy your software to your virtual server and put your website or web app on the streets of the internet. In another post, I will talk about how to deploy your code to your EC2 Instance, till then stay tuned! Cheers guys.
